


I love memorabilia items that you can make at home yourself. I have used a number of different types over the years to make little hand prints for my Little One, foot prints, etc…. The latest kit that I tried was the Baby and Me Casting Kit from Annette’s Keepsakes.
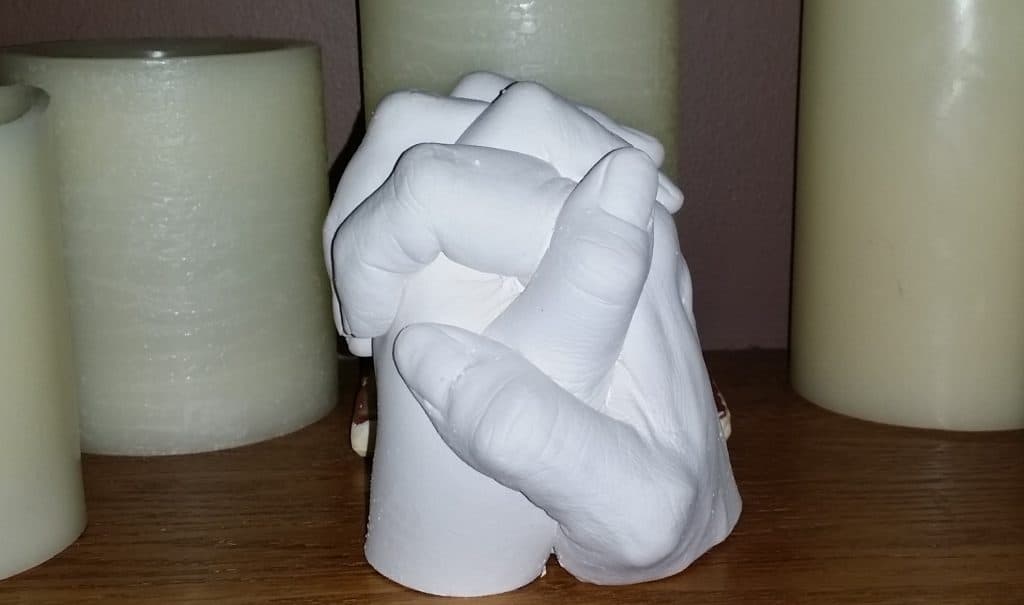
Here is the finish product of my Little One’s hand with my hand from our Baby and Me Casting Kit……
Features:
This kit will cast a baby’s hand or foot with Mom or Dad or two children holding hands in two easy steps:
Step 1: Create the Mold
The hand or foot is immersed into a warm molding mix. In about 30-60 seconds it will set into a rubbery mold and the hand or foot can be removed.
Step 2: Create the Casting
Fill the mold with the stone powder mix and allow to dry. In two hours you can peel away the mold to reveal your beautiful casting.
Once completed the casting can be lacquered or spray-painted.
The molding medium in all of the kits is non-toxic and non-allergenic.
Making our cast was very easy to do. The hardest part of it is waiting for it to dry as we were all impatient to see our artwork.
Here are my tips through each stage for making a great mold and keepsake…
In step 1 when you are creating the mold, make sure that you have practiced the position you will use. Make sure you also know how you are placing your hands in the supplied bucket for molding as your little one has to be comfortable for a minute. There is no second chance so you need to be able to hold steady for the 60 seconds that the mold is congealing.
Make sure that your hand and your little one’s hand is not touching the side of the molding bucket. Do a dry run and then adjust when in there if you are feeling the side at all.
Once your mold is complete you enter step 2 where you will make the casting material and fill the mold. The most important thing to do in this step is to gently tap the bottom of the molding bucket on the counter as the casting material goes in there. You need to get all those air bubbles out or they will be in your finished product. I did do tapping and was too afraid to do it too much, which resulted in a few bubbles and incomplete finger tips. I should have tapped more because the casting material needs to get into all the curves your fingers have made.
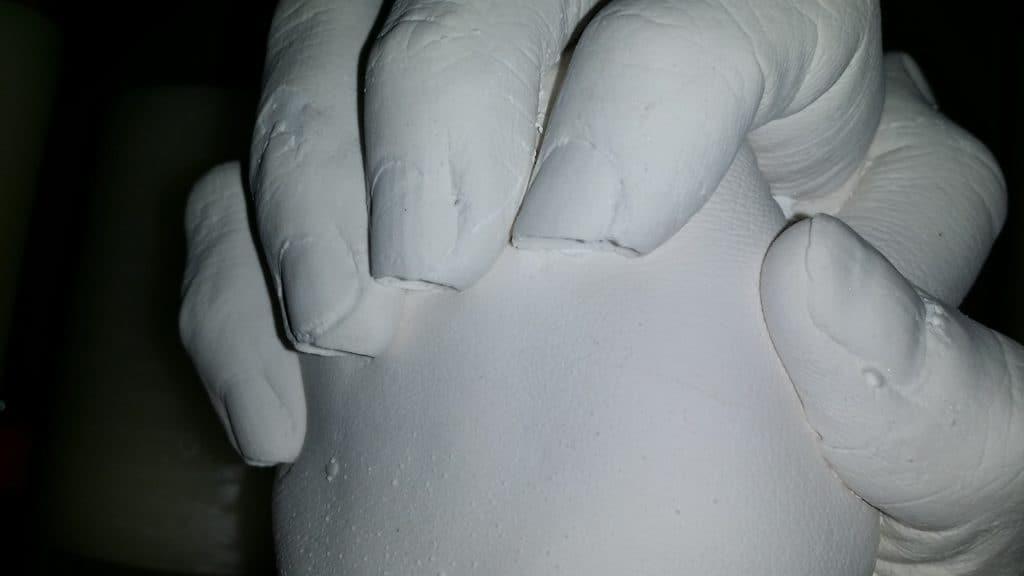
If you are looking at our casting, you cannot notice the missing fingertips you see in the photo above. It is only when I lay it on its side that you can see them. The missing fingertips would have been avoided if I was not too shy to tap the molding bucket on the counter as the casting material went in. I had to get the casting material up and over, then down again, so you really have to make the casting material work its way around.
After the two steps are done, you need to wait for 2 hours to peel away the mold to see the casting. I used a toothpick to get in the small areas to get the molding material out. It was very easy to get clean.
The last step is to wait a good week to let it dry all the way so you can lacquer it. If you do not lacquer your casting, you run the risk of it getting stained. So make sure to protect your artwork so it lasts a long time.
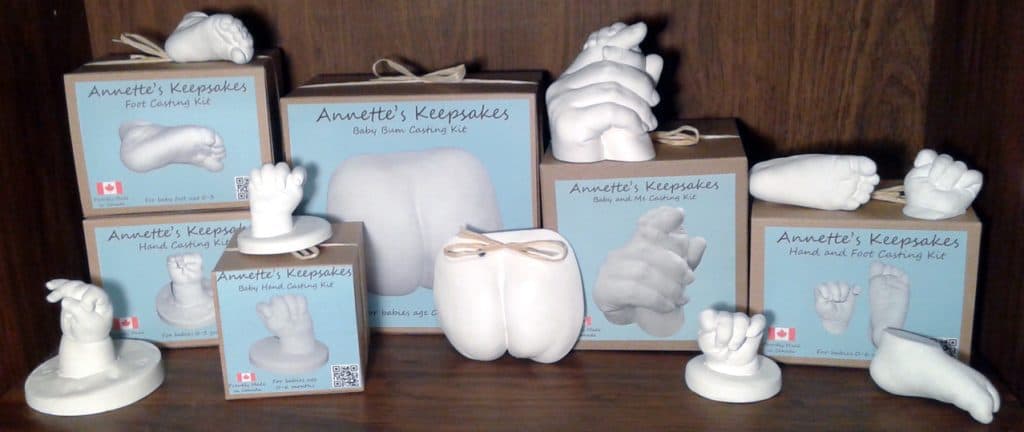
Annette’s Keepsakes makes so many different types of casting kits and other items. Here are just a few items in the Annette’s Keepsakes casting kits…..
I really recommend that you check Annette’s Keepsakes out. It is a great baby shower gift, new parents gift, birthday celebration to mark the years, and of course a great mother’s or father’s day gift.
You can find out more about Annette’s Keepsakes and all their products here….
Disclosure: MomMomOnTheGo was provided product for the purposed of conducting this review. As always, MomMomOnTheGo only supports companies, products, and services that she loves.